主题
mac原生终端美化记录
网络准备
安装 clash,然后复制终端命令:
sh
export https_proxy=http://127.0.0.1:7897 http_proxy=http://127.0.0.1:7897 all_proxy=socks5://127.0.0.1:7898在命令行执行,使其可以通过代理安装我们需要的软件,加快速度( 不同软件/代理的端口可能不同,请自行甄别 ) 如果没有代理软件,也可使用国内镜像,见下个章节
Homebrew
Homebrew 是 mac 上强大的包管理工具,目前支持 macOS 和 Linux 系统。主要有四个部分组成:brew、homebrew-core 、homebrew-cask、homebrew-bottles,日常使用 brew 命令。
安装
执行以下安装命令即可:
sh
/bin/bash -c "$(curl -fsSL https://raw.githubusercontent.com/Homebrew/install/HEAD/install.sh)"使用国内镜像
如果没有代理软件,可以使用国内镜像,安装命令如下:
sh
/bin/zsh -c "$(curl -fsSL https://gitee.com/cunkai/HomebrewCN/raw/master/Homebrew.sh)"执行 brew --version 验证是否安装成功。
sh
❯ brew --version
Homebrew 4.2.5更换国内下载源
- 更换
brew.git
sh
git -C "$(brew --repo)" remote set-url origin https://mirrors.ustc.edu.cn/brew.git # 中科大
或
git -C "$(brew --repo)" remote set-url origin https://mirrors.aliyun.com/homebrew/brew.git # 阿里巴巴
或
git -C "$(brew --repo)" remote set-url origin https://mirrors.tuna.tsinghua.edu.cn/git/homebrew/brew.git # 清华大学- 更换
homebrew-core.git
sh
git -C "$(brew --repo homebrew/core)" remote set-url origin https://mirrors.ustc.edu.cn/homebrew-core.git # 中科大
或
git -C "$(brew --repo homebrew/core)" remote set-url origin https://mirrors.aliyun.com/homebrew/homebrew-core.git # 阿里巴巴
或
git -C "$(brew --repo homebrew/core)" remote set-url origin https://mirrors.tuna.tsinghua.edu.cn/git/homebrew/homebrew-core.git # 清华大学- 更换
homebrew-cask.git
sh
git -C "$(brew --repo homebrew/cask)" remote set-url origin https://mirrors.ustc.edu.cn/homebrew-cask.git # 中科大
或
git -C "$(brew --repo homebrew/cask)" remote set-url origin https://mirrors.aliyun.com/homebrew/homebrew-cask.git # 阿里巴巴
或
git -C "$(brew --repo homebrew/cask)" remote set-url origin https://mirrors.tuna.tsinghua.edu.cn/git/homebrew/homebrew-cask.git # 清华大学- 更换
homebrew-bottles
sh
echo 'export HOMEBREW_BOTTLE_DOMAIN=https://mirrors.aliyun.com/homebrew/homebrew-bottles' >> ~/.bash_profile # 阿里云
或
echo 'export HOMEBREW_BOTTLE_DOMAIN=https://mirrors.ustc.edu.cn/homebrew-bottles/bottles' >> ~/.bash_profile # 中科大
或
echo 'export HOMEBREW_BOTTLE_DOMAIN=https://mirrors.tuna.tsinghua.edu.cn/homebrew-bottles/bottles' >> ~/.bash_profile # 清华大学

source ~/.bash_profile更新软件包
sh
brew update如果可以更新成功,说明更换的源可用。
恢复默认源
某些情况下,可能我们使用的国内源挂掉了,就需要恢复默认源。
sh
1. git -C "$(brew --repo)" remote set-url origin https://github.com/Homebrew/brew.git
2. git -C "$(brew --repo homebrew/core)" remote set-url origin https://github.com/Homebrew/homebrew-core.git
3. git -C "$(brew --repo homebrew/cask)" remote set-url origin https://github.com/Homebrew/homebrew-cask.git
4. 删除环境变量 HOMEBREW_BOTTLE_DOMAIN
5. source ~/.bash_profile
6. brew update意外处理
- 先执行
brew doctor查看问题,按照指示对问题进行修复 - 执行
brew update-reset将 homebrew 还原到稳定版 - 执行
brew update更新软件包
常用命令
sh
brew install node #默认安装最新版
brew install [email protected] #安装指定版本
brew switch node 16.0.0 #切换版本
brew upgrade name #更新安装过的软件(如果不加软件名,就更新所有可以更新的软件)
brew uninstall node #卸载node

brew services list #获取services列表
brew services start/stop/restart serverName # 启动服务
  brew services start mysql #启动mysql服务
  brew services restart mysql #重启mysql服务
  brew services stop mysql #停止mysql服务

brew config #查看brew配置
brew info node #查看node安装信息
brew list #查看已安装软件
brew list --versions #查看已安装软件版本号
brew search node #搜索可用node相关软件
brew update #brew自身更新
brew cleanup #清除下载的缓存
brew doctor #诊断brew,并给出修复命令卸载
sh
/bin/zsh -c "$(curl -fsSL https://gitee.com/cunkai/HomebrewCN/raw/master/HomebrewUninstall.sh)"zsh
zsh 是一个兼容 bash 的 shell,相较 bash Tab 补全功能强大、插件和主题丰富、可定制性较高
安装
sh
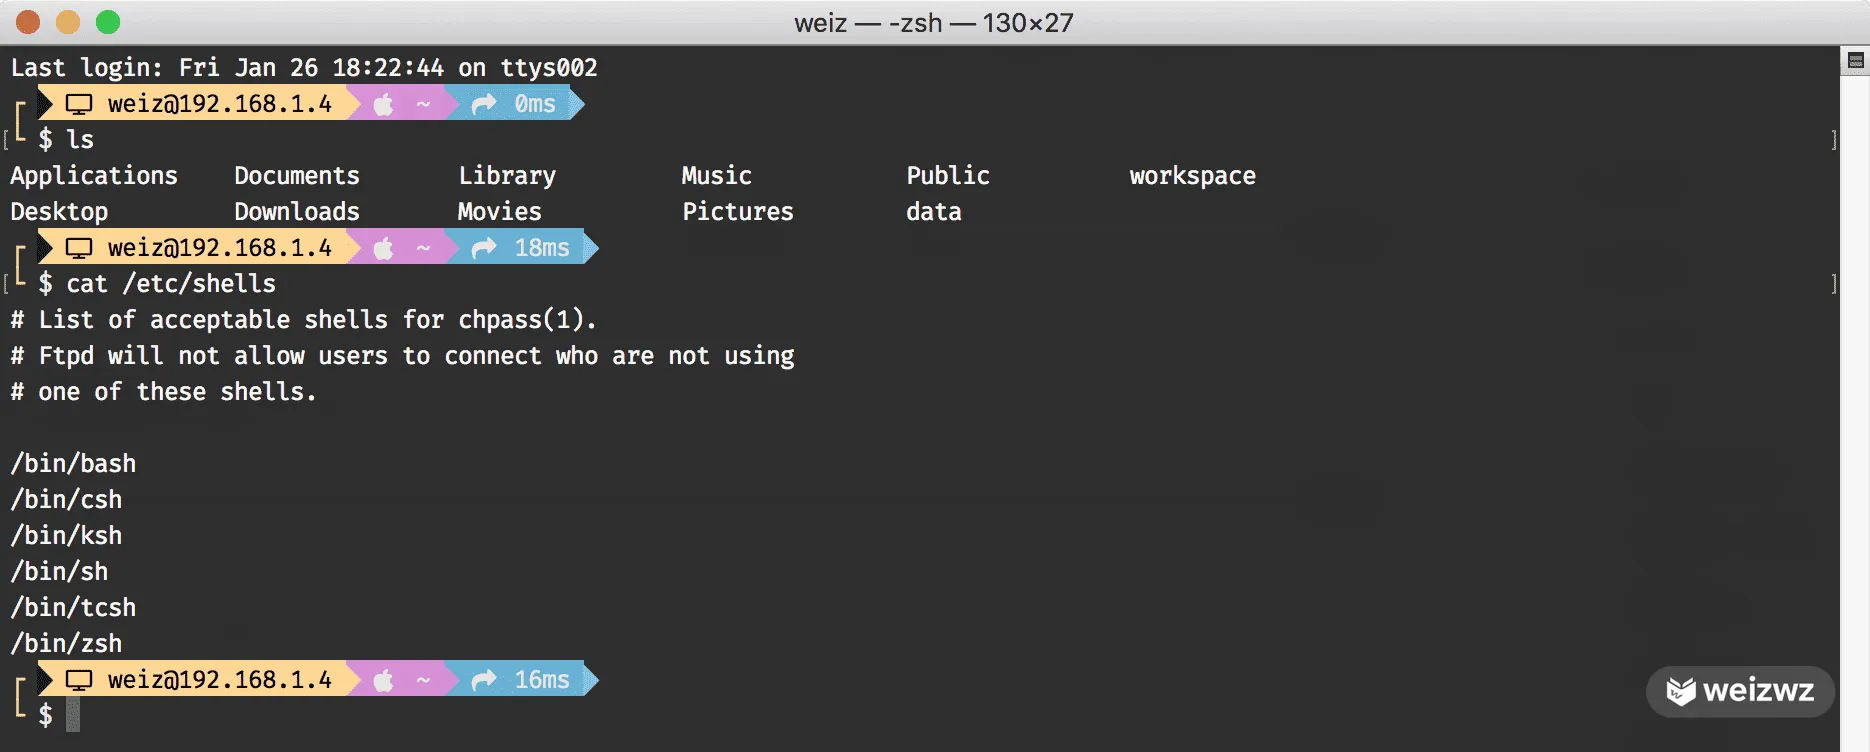
brew install zsh安装好后,使用 cat /etc/shells 查看系统可以用的 shell:
sh
❯ cat /etc/shells
# List of acceptable shells for chpass(1).
# Ftpd will not allow users to connect who are not using
# one of these shells.

/bin/bash
/bin/csh
/bin/ksh
/bin/sh
/bin/tcsh
/bin/zsh使用 chsh -s /bin/zsh 命令将 zsh 设置为系统默认 shell。关闭后重新打开终端,即可使用 zsh 了。 安装好后,会自动生成 .zshrc 文件,即是 zsh 的配置文件。如果没有这个文件的话,你也可以吃新建一个,输入命令:touch ~/.zshrc 即可。
配置
由于自己配置zsh 比较复杂,所以我们自己采用一项开源的配置项目 oh-my-zsh。它是一套非常完善的 zsh 配置方案,可以做非常多的定制化功能,比如主题,字体,插件等。 安装也非常简单:
sh
sh -c "$(curl -fsSL https://raw.github.com/ohmyzsh/ohmyzsh/master/tools/install.sh)"插件安装
autojump 可以记录下之前 cd 命令访过的所有目录,下次要去那个目录时不需要输入完整的路径,直接 j somedir 即可到达,甚至那个目标目录的名称只输入开头即可。 执行以下命令,安装 autojump:
sh
brew install autojumpoh-my-zsh支持非常多的插件,其中很有用的两个插件是zsh-autosuggestions和zsh-syntax-highlighting,分别用于命令提示和语法高亮:
sh
git clone https://github.com/zsh-users/zsh-autosuggestions ${ZSH_CUSTOM:-~/.oh-my-zsh/custom}/plugins/zsh-autosuggestions
git clone https://github.com/zsh-users/zsh-syntax-highlighting.git ${ZSH_CUSTOM:-~/.oh-my-zsh/custom}/plugins/zsh-syntax-highlighting安装好后,在~/.zshrc 配置中加上这三个个插件:
sh
plugins=(
  git
  autojump
  zsh-autosuggestions
  zsh-syntax-highlighting
)最后在终端输入 source ~/.zshrc,使其生效即可。
oh-my-posh
oh-my-posh 是一款漂亮的终端主题,之前在 win11 上就用的是这个。
下载
sh
brew install jandedobbeleer/oh-my-posh/oh-my-posh安装字体
安装此字体是为了支持后续的字体图标显示。当然如果后面的 oh-my-posh 主题中没有使用字体图标,那么不安装这些字体也是可以的,建议安装。
打开 https://www.nerdfonts.com/font-downloads,安装你想要的字体,这里我使用的是 FiraCode Nerd Font 如果打不开此网站的话,推荐百度网盘
txt
链接: https://pan.baidu.com/s/1XwarSrO_-kjgehaMSB6VgQ 提取码: kncf 复制这段内容后打开百度网盘手机App,操作更方便哦打开 终端,点击左上角 终端 -> 偏好设置-> 描述文件,选择主题后 -> 字体,选择 FiraCode Nerd Font 后保存
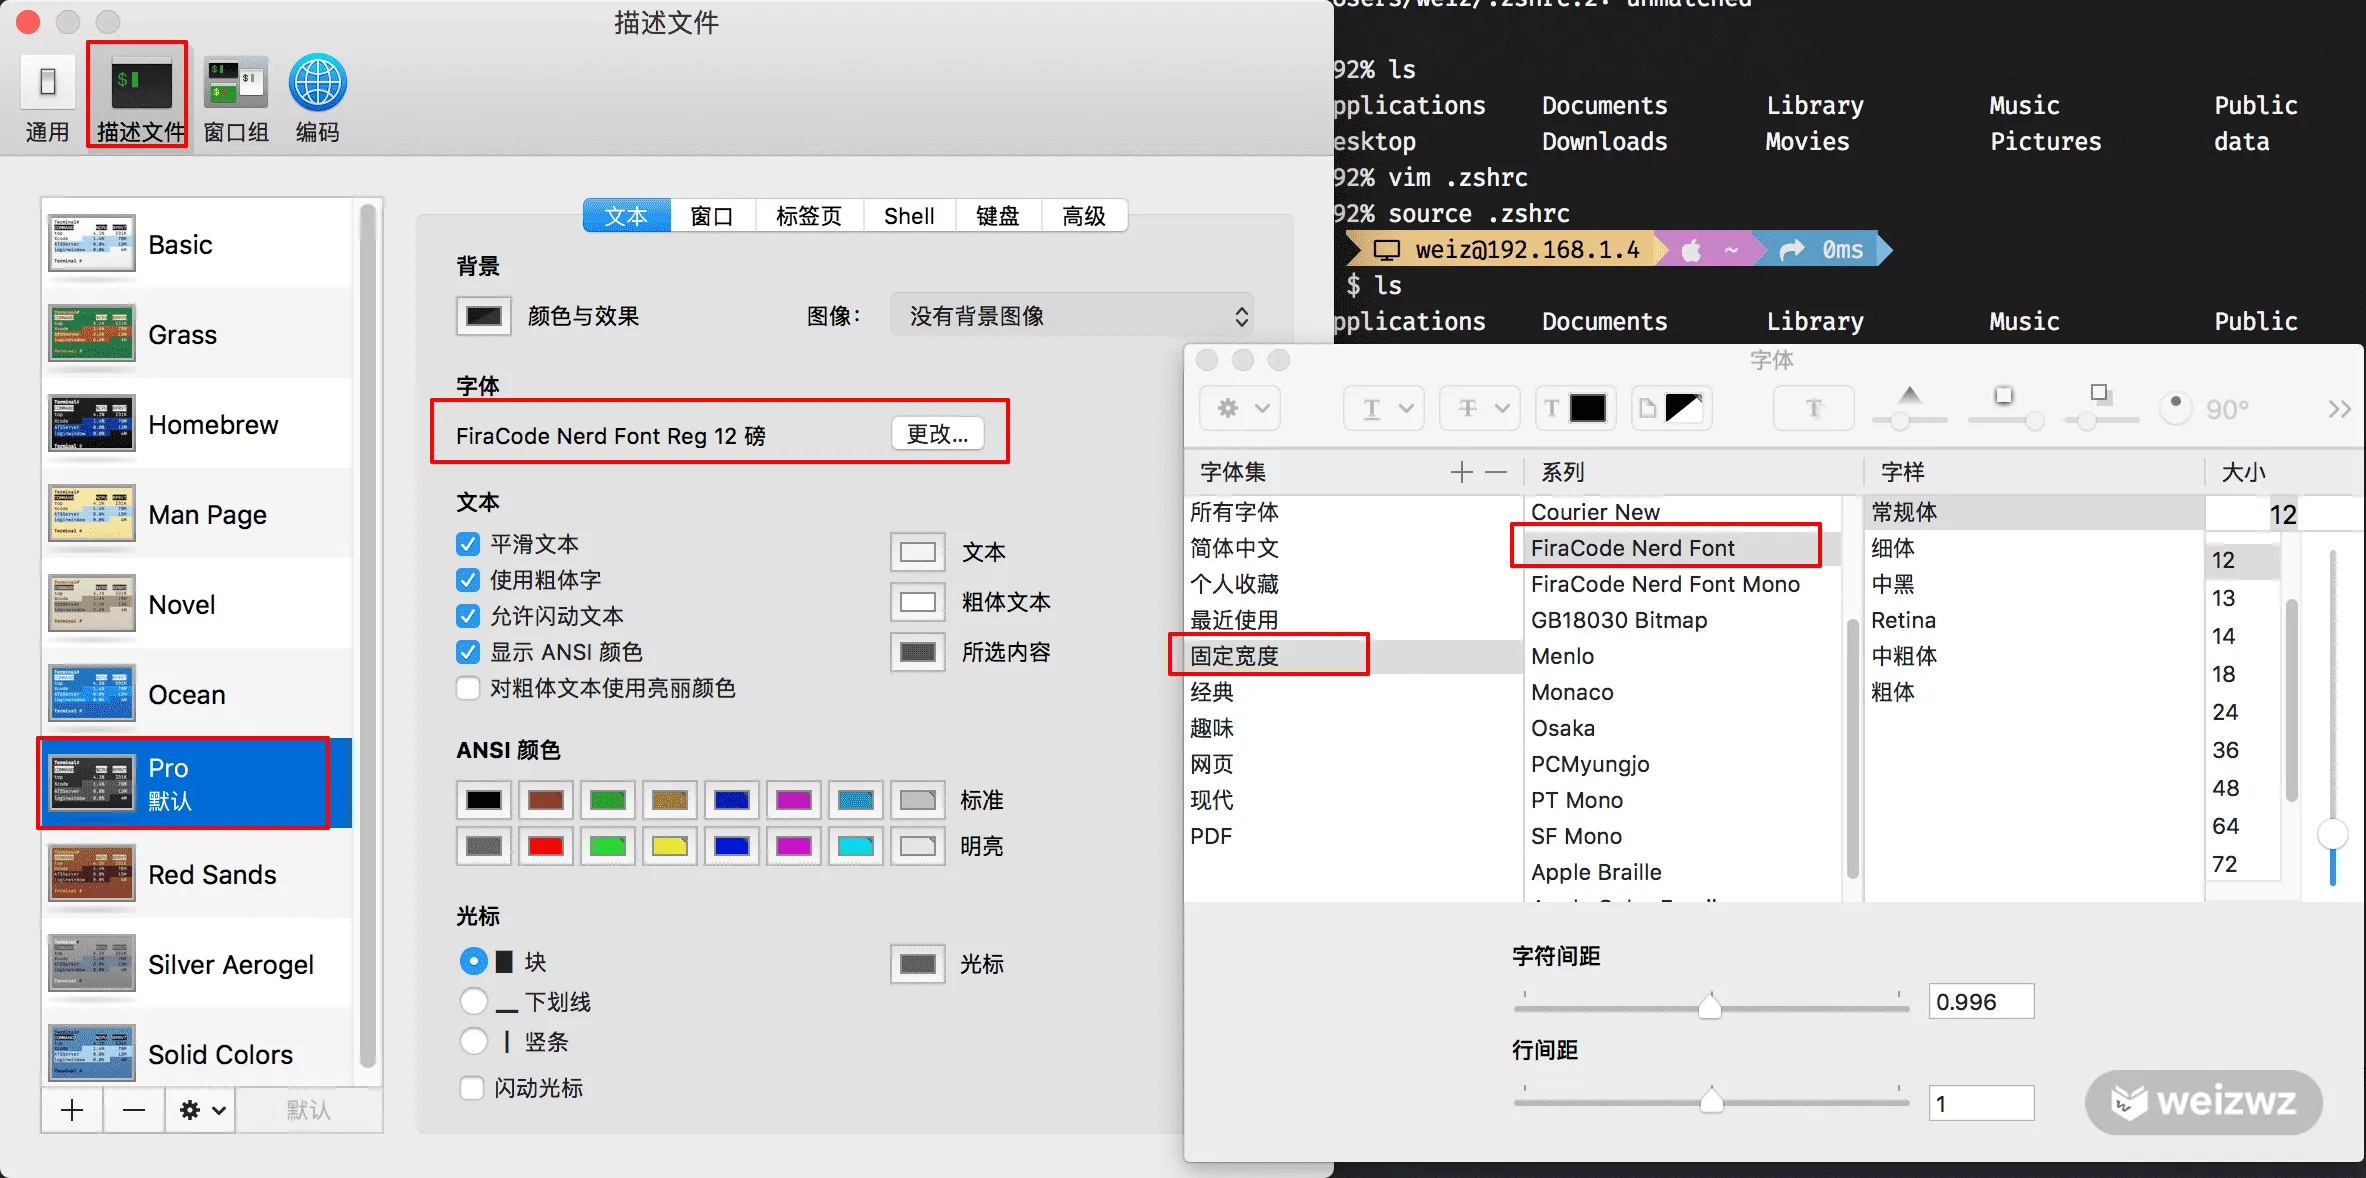
如果其他 IDEA 有使用到终端的话,建议也设置这种图标字体
配置
修改 .zshrc 文件,vim .zshrc,然后输入以下内容:
txt
eval "$(oh-my-posh init zsh --config $(brew --prefix oh-my-posh)/themes/markbull.omp.json)"markbull.omp.json 是你想要的主题名称,主题可以去 https://ohmyposh.dev/docs/themes 里查找。
配置好后,执行 source ./zshrc 即可生效。
关闭终端后,重新打开,即可看到你的主题已生效!